
- Jul 30, 2025
How to make business cards at home: an artistic way of making striking easel business cards that will showcase your art.
[disclaimer: this is not my original idea. I was trying to look for a good way to make "different" business cards, and browsing online I found this cute design. Through a Google search I could not find where the design was from, the manufacturer seemed disappeared, so, after swallowing the frustration, I decided to take the idea and make it my own]
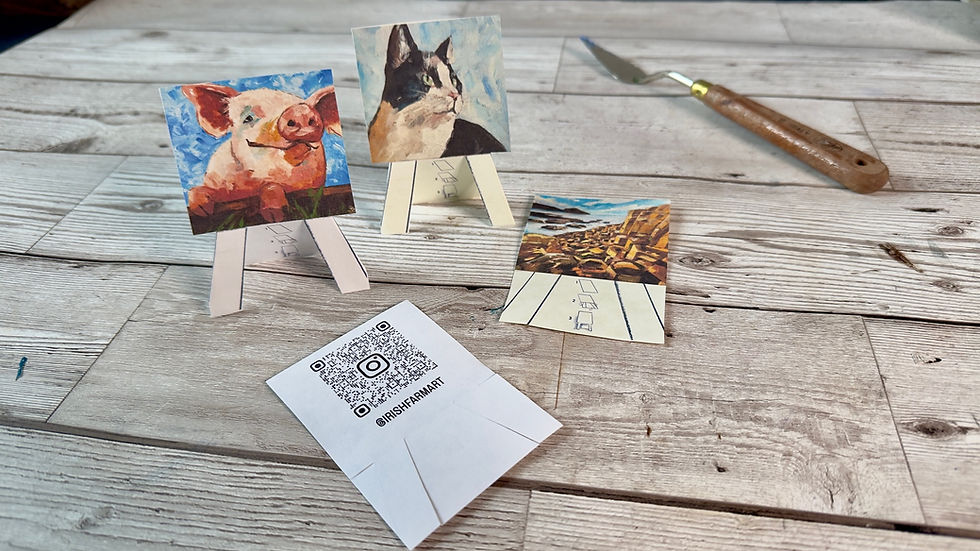
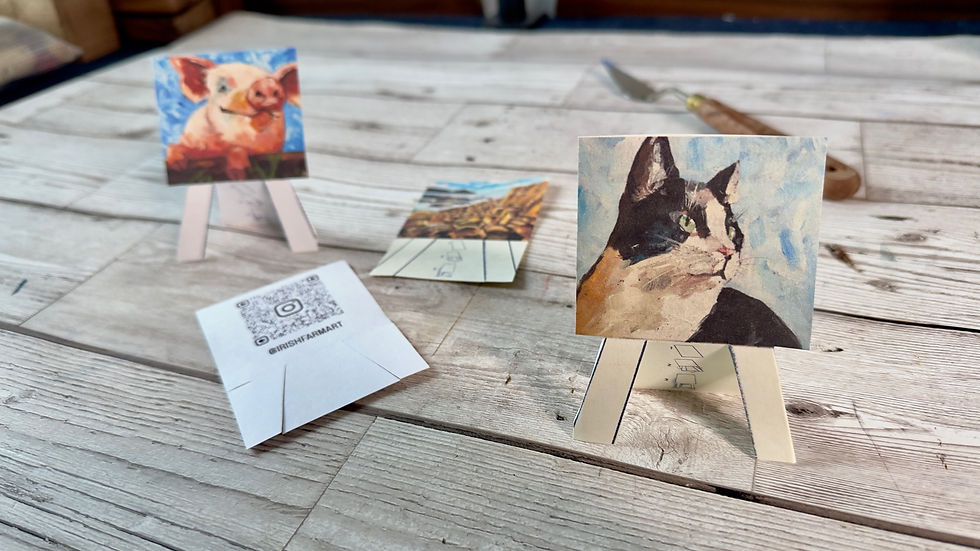
Very simple and yet very striking
These completely homemade business cards shaped like a cute little easel will allow you in only a few easy steps and a material, to create your own, and showcase all your artwork. In the front we have a very simple design: I decided to make it look exactly like an easel, and only put my paintings on it. On the back you can get crazy and add whatever you wish: business info, website, social media links, or even a cute little phrase. I decided to go for a QR code to link to my Instagram account.
How to make the business cards
Materials:
Download the templates folders: you will find two image ( .jpg) files for the front and back of the business cards.
Procreate on Ipad (other software may work as well, but unfortunately I am not familiar with those. If you wish, please comment below with what other software may be used instead)
Card stock (like Bristol paper. I use 180 gsm)
A printer
A pair of scissors
Lets get started:
You can follow the full video instruction on my youtube account.
For the front:
You have already downloaded the templates from the folder or you could add the folder on your Google Drive
Open Procreate on Ipad, click on the + sign and open a New Canvas choosing the A4 option (if you are creating one from scratch size it at 210 x 297 mm)
Click on the Action button (the spanner shaped button on the left top of the screen), and click on insert a file
Click on the Google Drive Icon, or on the folder you saved your templates
On the main screen the two templates should appear and click on "front template". This should open the template on the main working page and automatically fit the page.
Now it's time to get creative. Click on the same spanner/action button and then on insert a photo
From your gallery choose the photo of your painting that you would like to add to the front of the business card
On the working sheet, click on the photo and change the measurements to 737px - 649px (NOTE: if the photo appears a bit wonky, try and stretch it a but and erasing the margins to fit the given measurements.
Now drag the photo within the first square shape of your easel business cards template.
Now we want to fill in all the easels, so you can choose another photo and follow the same steps (6 to 9) or copy the same photo as follows:
Go into layers
On the layer of the image swipe left with one finger and duplicate
On the working page drag the photo to the second easel.
Repeat as you wish.
Send to printer (I recommend formatting your printer for A4 size paper, and good quality image)
For the back:
Repeat the process as per the front but opening the "back template"
You can decide now to add another image, perhaps a QR code, if so follow the steps as per the front, adding the QR code that you already saved in your Photo Gallery and sizing it to 737px - 735px , than drag it to the first square, and duplicating the layer for the second and so on. If you'd like to add a text for your business information follow these steps:
Click on the Action Button/Spanner and add text
Click on the text and write all your details
Once the text is formatted to your preference click on the text, and resize to 737px - 649px
Now you can follow the same process as you did for the images i.e.: drag the text to the first square, duplicate the layer and fill the entire page.
Send to printer.
Making up:
Cut along the lines outlined in red:
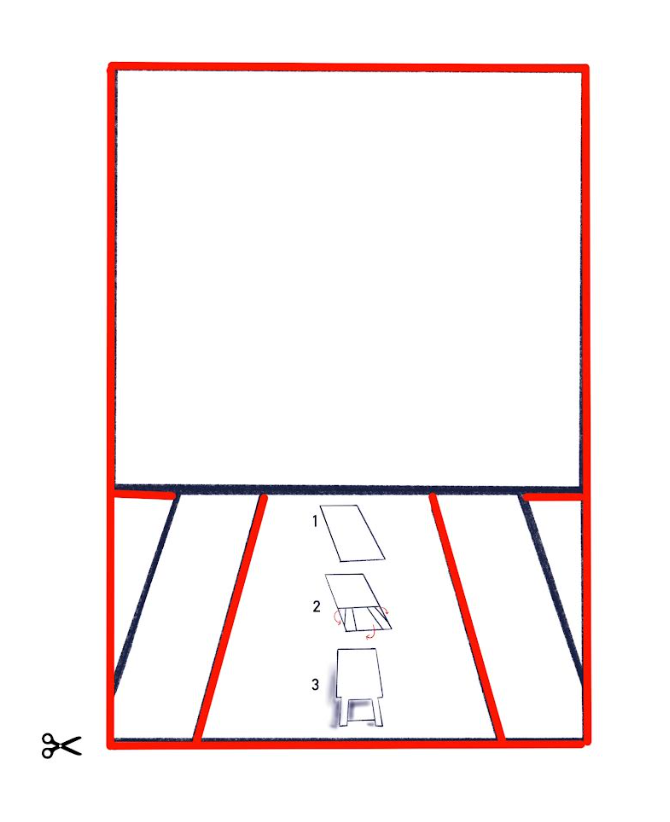
I like to keep them flat to carry it easily and give them out in markets and art fairs, and they are a bit of fun for potential customers to get to work and fold them on themselves. Otherwise, you can prepare them folded by following the instruction on the card flap.
Check out my step-by-step video on Youtube!
Please share with me your results, and any feedback you may have!


